Google Tag Manager Not Working? Debugging Guide

Google Tag Manager (GTM) is an invaluable tool for marketers and website owners, allowing you to deploy and manage marketing and analytics tags (like Google Analytics, Google Ads conversion tracking, Facebook Pixel) without directly editing your website's code. However, like any powerful tool, GTM can sometimes present challenges when tags aren't firing as expected. Debugging GTM issues can be frustrating, but with a systematic approach, most problems can be identified and resolved. This detailed debugging guide will walk you through common issues, including container errors, preview mode problems, and conflicting scripts, providing step-by-step solutions.
Understanding Google Tag Manager Basics
Before debugging, it's helpful to remember the core components of GTM:
- Container: The main snippet of code placed on your website that holds all your tags, triggers, and variables.
- Tags: The actual snippets of code (e.g., Google Analytics tracking code, Google Ads conversion pixel) that send data to third-party systems.
- Triggers: Rules that specify when a tag should fire (e.g., on a page view, a click, a form submission).
- Variables: Placeholders for values that change (e.g., transaction ID, product price, page URL) that tags and triggers can use.
Step 1: Verify GTM Container Code Installation
The foundation of GTM functionality lies in the correct installation of its container snippets on your website. If these are missing or incorrectly placed, no tags will fire.
-
Step 1.1: Locate Your GTM Container Snippets.
- Log in to your GTM account.
- On your container's dashboard, click on your GTM ID (e.g.,
GTM-XXXXXXX) in the top right corner. - You'll see two code snippets: one for the
<head>section and one for immediately after the opening<body>tag.
-
Step 1.2: Check Your Website's Source Code.
- Open your website in a browser.
- Right-click anywhere on the page and select "View Page Source" (or "Inspect Element" > "Elements" tab).
- Search for the
<head>snippet: Look for the<script>tag containinggoogletagmanager.com/gtm.js?id=GTM-XXXXXXX. It should be as high as possible within the<head>. - Search for the
<body>snippet: Look for the<noscript>tag with aniframecontaininggoogletagmanager.com/ns.html?id=GTM-XXXXXXX. It should be immediately after the opening<body>tag. - Verify ID: Ensure the
GTM-XXXXXXXID in both snippets exactly matches your GTM container ID.
-
Step 1.3: How to Fix Missing/Incorrect Code.
- Manual Placement: If the code is missing or incorrect, copy the exact code from GTM and paste it into the appropriate sections of your website's theme files (e.g.,
header.phpfor the<head>snippet, orfooter.phpor the main template file for the<body>snippet if your CMS doesn't offer a specific<body>hook). - CMS Plugin: For WordPress, plugins like "Insert Headers and Footers" or dedicated GTM integration plugins can help you correctly place the snippets without directly editing theme files.
- Developer Assistance: If you're uncomfortable editing code directly, ask your web developer for assistance.
- Manual Placement: If the code is missing or incorrect, copy the exact code from GTM and paste it into the appropriate sections of your website's theme files (e.g.,
Step 2: Utilize GTM Preview Mode for Real-time Debugging
GTM's Preview mode is your most powerful debugging tool. It allows you to browse your website and see exactly which tags are firing (or not firing) and why, without affecting live users.
-
Step 2.1: Enable GTM Preview Mode.
- Log in to your GTM account.
- Click the "Preview" button in the top right corner of your workspace.
- Enter the URL of your website and click "Connect." This will open your website in a new browser tab or window, along with the Tag Manager debugger panel at the bottom.
-
Step 2.2: Navigate Your Website and Observe the Debugger.
- As you click through your website, observe the "Summary" on the left panel of the debugger. Each page load, click, form submission, or other user interaction will generate a data layer event.
- Click on each event in the "Summary" to see what happened at that point.
-
Step 2.3: Inspect Tag Firing Status.
- For each event, click on the "Tags" tab in the main debugger window.
- "Tags Fired": These are the tags that successfully fired for that event.
- "Tags Not Fired": These are the tags that *should* have fired but didn't. This is where you'll find your issues.
- Click on "Tags Not Fired" entries: When a tag doesn't fire, click on its name in the "Tags Not Fired" section. The debugger will show you the exact reason it didn't fire, usually because one or more of its trigger conditions were not met.
-
Step 2.4: Common Preview Mode Findings & Fixes.
- Trigger Conditions Not Met: This is the most frequent cause.
- Incorrect Page URL: If your trigger uses "Page URL equals," ensure the URL exactly matches. Check for trailing slashes,
wwwvs. non-www, HTTP vs. HTTPS. - Case Sensitivity: URLs or variable values might be case-sensitive.
- Missing Element IDs/Classes: For click triggers, ensure the element's ID or class exactly matches what's in your trigger. Use "Inspect Element" in your browser to verify.
- Form Submission Issues: If using a "Form Submission" trigger, ensure it's configured for the correct form and that the form isn't being submitted via an AJAX request that prevents the standard GTM listener from detecting it.
- Custom Event Not Pushed: If your tag relies on a custom event (e.g.,
dataLayer.push({'event': 'myCustomEvent'});), verify that this code is actually executing and pushing the event to the data layer. Check the "Data Layer" tab in the debugger.
- Incorrect Page URL: If your trigger uses "Page URL equals," ensure the URL exactly matches. Check for trailing slashes,
- Tag Configuration Errors:
- Incorrect Tracking IDs: Ensure your Google Analytics, Google Ads Conversion ID (like
AW-XXXXXXXXX/YYYYYYYYYYYfrom our Google Ads Conversions Not Tracking guide), or other service IDs are correctly entered in your GTM tag. - Missing Variables: If your tag uses variables (e.g., for conversion value, transaction ID), ensure those variables are correctly defined and populated with actual data in the "Variables" tab of the debugger.
- Incorrect Tracking IDs: Ensure your Google Analytics, Google Ads Conversion ID (like
- Trigger Conditions Not Met: This is the most frequent cause.
-
Step 2.5: Publish Changes. After making any corrections in GTM, always click "Submit" and "Publish" your container to push changes live. Changes in Preview Mode are not live until published.
Step 3: Check for Conflicting Scripts and Ad Blockers
Sometimes, external factors on your website or in the user's browser can interfere with GTM and tag firing.
-
Step 3.1: Identify Conflicting Scripts.
- Browser Console Errors: Open your browser's developer console (F12 or Cmd+Option+I) while on your website. Look for JavaScript errors (red messages) that might indicate a script conflict or a broken script that's preventing GTM from executing properly. Our guide on common website errors is a good reference.
- Third-Party Integrations: If you have other analytics, marketing, or security scripts directly embedded on your site, they might occasionally conflict with GTM's operation. Try temporarily disabling other scripts one by one (if feasible in a staging environment) to isolate the conflict.
- CMS Plugins: For WordPress, some plugins might interfere with GTM. You might need to troubleshoot this by deactivating plugins one by one, similar to how you fix contact form issues or WordPress login page problems.
-
Step 3.2: Account for Ad Blockers.
- Ad blockers can prevent GTM and its tags from firing, especially those related to advertising networks (like Google Ads).
- Test Incognito Mode: Test your website in an incognito/private browser window with all extensions (including ad blockers) disabled. If tags fire here but not in your regular browser, an ad blocker or extension is likely the culprit.
- Client-Side vs. Server-Side: While you can't force users to disable ad blockers, be aware that your analytics and conversion data might be slightly underreported due to them. For critical data, consider server-side tracking solutions where applicable.
-
Step 3.3: Inspect Website Speed.
- A very slow website can cause scripts, including GTM, to time out or load improperly, especially on slower connections or mobile devices.
- Use tools like Google PageSpeed Insights or GTmetrix to assess your site's speed. Address any performance bottlenecks, as discussed in why your website is so slow and how to speed up your site.
Step 4: Review Data Layer Implementation (for Custom Events/Variables)
If your GTM setup relies on custom events or variables pushed to the data layer, ensure these pushes are correctly implemented by your developers.
-
Step 4.1: Check Data Layer Contents in Preview Mode.
- In GTM Preview mode, click on the relevant event in the "Summary" (e.g., "Page View" for a page, or a custom event name).
- Go to the "Data Layer" tab in the debugger. This will show you exactly what information is being pushed to the data layer at that specific moment.
- Verify that the expected custom events and variables are present and correctly populated.
-
Step 4.2: Debug
dataLayer.push()Code.- If data is missing or incorrect, inspect the JavaScript code on your website that performs the
dataLayer.push(). - Ensure the syntax is correct and that the values being pushed are accurate.
- If data is missing or incorrect, inspect the JavaScript code on your website that performs the
Debugging Google Tag Manager requires patience and a systematic approach. By carefully verifying your container installation, leveraging GTM's powerful Preview mode, and being aware of potential conflicts, you can efficiently troubleshoot and resolve most tagging issues. Accurate tag firing ensures your marketing and analytics data is reliable, enabling you to make informed decisions. If you've exhausted these steps and are still facing GTM challenges, or need assistance with complex tag management, don't hesitate to contact WebCareSG for expert website and digital marketing support.
Related WebCare Solutions

How to Fix ‘No Events Received’ in Facebook Events Manager
A comprehensive guide to troubleshooting and resolving the "No Events Received" status in Facebook Events Manager, focusing on common issues with CAPI setup and server-side tracking errors.

PHP Exploits & Vulnerabilities: How to Secure Your Site
A comprehensive guide to understanding and mitigating PHP exploits and vulnerabilities, including steps for updating PHP and disabling dangerous functions to secure your website.
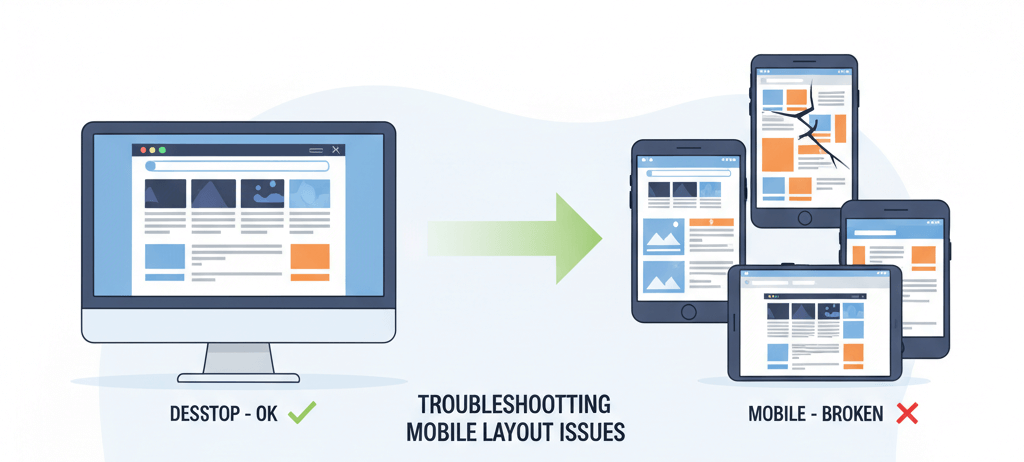
Mobile Layout Looks Wrong but Desktop is Fine: A Responsive Design Troubleshooting Guide
Inspect responsive breakpoints, viewport meta tag, mobile-specific CSS, and plugin/theme mobile settings causing layout shifts.
Ready to get started?
Focus on your business while we fix your website. Contact WebCareSG today for fast, reliable solutions!
Whatsapp us on