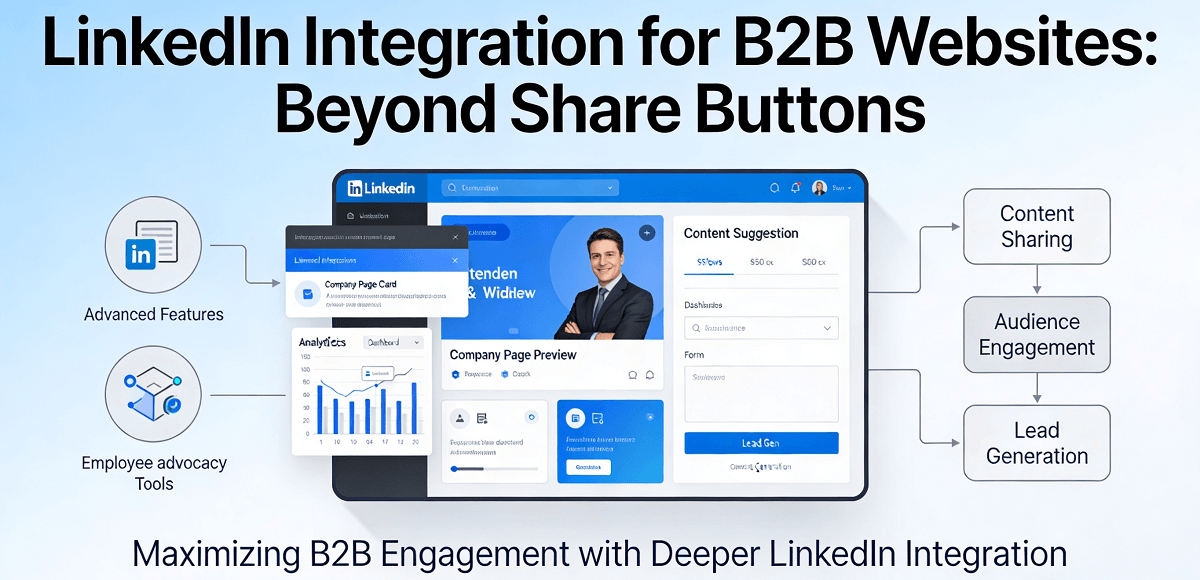
When Singapore business owners think about LinkedIn integration on their websites, most of them immediately jump to adding a "Share on LinkedIn" button. It is the most visible and simplest thing to implement, which is probably why it is the most common approach. But here is the uncomfortable truth: those little share buttons are doing almost nothing meaningful for your B2B business. They are like putting up a small signpost in a massive mall and hoping the right customers will find you. The share button is visible, yes. But it does not work invisibly in the background to build your credibility, generate leads, or help search engines understand who you are and what you offer.
That is not to say share buttons are useless. They have their place. But if you are running a B2B website in Singapore and LinkedIn is part of your business development strategy, you deserve to know about the full toolbox of LinkedIn integration options that actually move the needle. This guide will walk you through step-by-step methods to connect your website with LinkedIn in ways that help potential clients find you, trust you, and ultimately reach out to do business with you.
We start with understanding why LinkedIn matters so much for B2B businesses in Singapore, then move into practical integration methods you can implement today, regardless of your technical background.
Why LinkedIn Integration Matters More Than Ever for Singapore B2B Businesses
Singapore has one of the highest LinkedIn usage rates in Asia. According to LinkedIn's own data, the platform has millions of users in Singapore, with a significant portion being decision-makers, managers, and professionals in corporate roles. When someone in Singapore is researching a B2B solution, LinkedIn is often where they go to verify your company, check who works there, and gauge your industry expertise before they ever fill out a contact form or send an email.
This means your website needs to do more than exist. It needs to have built-in connections that tell LinkedIn "this is a legitimate business with real people who know what they are talking about." Each integration point between your website and LinkedIn is an opportunity to transfer trust signals. The more connected your website is to your LinkedIn presence, the more complete the picture looks to someone researching you.
Beyond trust, there is the search engine optimization angle. Google and other search engines have gotten much better at understanding who you are across the internet. When your LinkedIn company page, your personal LinkedIn profile, and your website all tell a consistent story with proper cross-linking and structured data, search engines reward that consistency with better rankings. The integrations we discuss in this guide are not just user experience improvements. They are also technical SEO strategies that help you get found online.
Step 1: Add LinkedIn Insight Tag to Your Website
The LinkedIn Insight Tag is a small piece of code that you add to your website's header. It is one of the most powerful and underused LinkedIn integration tools available to B2B website owners. Once installed, it allows you to track conversions from LinkedIn ads, retarget website visitors with LinkedIn advertising, and get valuable demographic data about who is visiting your website.
Here is how to implement it step by step:
Step 1: Log into your LinkedIn account and navigate to your Company Page. Click on the "Admin Tools" dropdown menu and look for "LinkedIn Page Analytics." From there, click on "Insight Tag" in the left sidebar menu.
Step 2: Click the "Install Insight Tag" button. LinkedIn will ask you to name your website and specify a URL. Use your exact domain name without www or https. For example, if your website is www.example.com.sg, just type example.com.sg.
Step 3: LinkedIn will generate a piece of code that looks something like this: _linkedin_partner_id and a JavaScript URL. Copy the entire code block that LinkedIn provides you.
Step 4: If you are using WordPress, go to your dashboard and navigate to Appearance, then Theme Editor. For most modern themes, you will find a file called "header.php" in the right sidebar. Look for the closing tag and paste your LinkedIn Insight Tag code just before it. Save the file. If you are using a theme builder or a custom theme, check with your developer or look for a dedicated field in your theme settings for tracking codes.
Step 5: If you are using a platform like Wix, Squarespace, or Shopify, look for a "Custom Code" or "Analytics" section in your settings. Paste the Insight Tag code there. Each platform has a slightly different interface but the idea is the same: get that code into every page of your website.
Step 6: Verify the installation by using LinkedIn's built-in diagnostic tool. Back in your LinkedIn Insight Tag dashboard, click "Verify Installation" and enter your website URL. LinkedIn will check if the tag is correctly installed.
Once installed, the LinkedIn Insight Tag starts collecting data immediately. After a few days, you will begin seeing demographic insights about your visitors, including which companies they work for, their job titles, and which pages they visit most. This information is gold for understanding whether your ideal customer is actually finding your website.
Step 2: Embed LinkedIn Company Updates on Your Website
Social proof is one of the most persuasive elements you can display on a B2B website. When potential clients see that your company has an active, engaged LinkedIn presence with regular posts and interactions, it builds credibility instantly. The good news is that LinkedIn makes it easy to embed your company feed directly onto your website.
Step 1: Go to your LinkedIn Company Page and navigate to the "Posts" section. Find a post you want to feature and click on the three dots menu in the top right corner of the post.
Step 2: Select "Embed this post." LinkedIn will generate an embed code that you can copy and paste onto your website. The embed will show the full post with any images, engagement metrics, and the option to like or comment directly from your website.
Step 3: On your WordPress website, create a new page or post where you want the feed to appear. Switch to the Text or HTML editor (not the visual editor) and paste the embed code. For other website platforms, look for a "Custom HTML" or "Embed" block and paste the code there.
Step 4: Preview the page to make sure the post renders correctly. Sometimes the embed can look oversized or oddly placed depending on your theme. You may need to adjust the width setting in the embed code. Look for the width parameter in the embed code and change it to something like width="100%" to make it responsive.
Step 5: Consider selecting a handful of your best posts rather than embedding a single post. Create a dedicated section on your homepage or a "Latest News" page that showcases three or four carefully chosen posts that demonstrate your expertise, client testimonials, or company culture. Curate them intentionally rather than just showing whatever happened to be posted most recently.
Embedding LinkedIn posts also has a secondary benefit for SEO. When search engines crawl your website and see embedded content from a known platform like LinkedIn, it adds to the credibility signals we discussed earlier. Your website is clearly connected to a real company with real activity.
Step 3: Add LinkedIn Follow and Connect Buttons That Actually Work
Standard share buttons are the bare minimum. But you want buttons that do more. LinkedIn offers several button types beyond sharing, including Follow buttons that let people subscribe to your company's updates without leaving your website.
Step 1: Go to the LinkedIn Plugin Page at linkedin.com/plugins. Browse the available plugin options. The most useful for B2B websites are the Company Plugin, which lets visitors follow your company with one click, and the Member Plugin, which lets visitors connect with a specific team member.
Step 2: For the Company Plugin, enter your company name and select your company from the dropdown list. LinkedIn will let you customize the appearance, including whether to show your company logo, the size of the button, and whether to include a "Message" call-to-action alongside the Follow button.
Step 3: Copy the generated code and add it to your website. On WordPress, use a custom HTML widget or block. Place it prominently, such as in your header area, your contact page, or a dedicated "Connect With Us" section. The goal is to make it effortless for someone who is impressed by your website to immediately follow you on LinkedIn without having to open a new tab and search for your page.
Step 4: For individual team members, especially if you are a consultancy or service-based business, consider adding Member Plugins for your key people. This allows visitors to connect directly with specific individuals on your team, which feels more personal and is particularly effective for B2B relationships where clients often want to connect with a specific person rather than a faceless company.
Step 5: Test all buttons after installation to make sure they function correctly. Click the Follow button yourself and verify that you appear as a follower on your own company's LinkedIn page. Test the Member Plugin by attempting to connect with one of your team members.
Step 4: Implement LinkedIn OAuth Login on Your Website
If your website has any form of login functionality, whether for a client portal, a resource library, a booking system, or any member-only area, you can offer LinkedIn OAuth login. This allows users to sign in with their LinkedIn credentials instead of creating a new username and password. For B2B websites, this is a significant convenience factor because many professionals already use LinkedIn daily and prefer not to manage yet another login.
Step 1: Go to the LinkedIn Developers Portal at developer.linkedin.com and create an application if you do not already have one. You will need a LinkedIn Company Page to create an app. Fill in the required information about your company and agree to LinkedIn's terms of use.
Step 2: Under the "Auth" section of your app, add your website URL to the list of authorized redirect URLs. This is critical because LinkedIn will only allow logins from URLs you explicitly authorize. Add both your main domain and any staging or development URLs if applicable.
Step 3: Note your Client ID and Client Secret. These will be needed for the OAuth implementation. If you are using a plugin-based platform like WordPress, look for a social login plugin that supports LinkedIn, such as "Nextend Social Login" or "Social Login." Configure the plugin with your Client ID and Secret.
Step 4: If you are using a custom website or a platform that supports custom OAuth integrations, LinkedIn provides detailed documentation at their developer portal. The basic flow involves redirecting the user to LinkedIn's authorization endpoint, receiving an authorization code, exchanging that code for an access token, and then using the access token to retrieve the user's basic LinkedIn profile information.
Step 5: Test the login flow thoroughly before making it live. Try logging in from different browsers and devices. Make sure the user profile information is being captured and stored correctly in your system. Also verify that users can still log in through any existing login methods you may have, as OAuth should be an additional option, not a replacement.
Step 5: Use Structured Data to Connect Your Website and LinkedIn Company Page
Structured data, also known as schema markup, is a form of code that helps search engines understand exactly what kind of entity your website represents. For B2B businesses, there is a specific Organization schema that lets you formally declare your company's LinkedIn profile URL alongside other information like your logo, address, contact details, and same-as references.
Step 1: Create a JSON-LD structured data block for your Organization. The basic structure includes your company name, URL, logo URL, and most importantly, your LinkedIn company page URL under the "sameAs" property. Here is a simplified example: "@context": "https://schema.org", "@type": "Organization", "name": "Your Company Name", "url": "https://www.example.com.sg", "logo": "https://www.example.com.sg/logo.png", "sameAs": ["https://www.linkedin.com/company/yourcompany"]
Step 2: Use Google's Rich Results Test tool to validate your structured data. Enter your homepage URL and run the test. Look for the Organization card in the results to confirm that Google is correctly reading your LinkedIn connection. If you see errors, the tool will tell you exactly what to fix.
Step 3: Implement the schema on your website. In WordPress, you can use a plugin like "Schema Pro" or "All in One SEO" to add Organization schema without touching code. In the plugin settings, look for an Organization or Person type and fill in your LinkedIn URL in the same-as fields.
Step 4: For custom implementations, add the JSON-LD block directly to the
section of your homepage. If you are comfortable editing your theme files, open header.php and paste the block before the closing tag. Make sure the JSON is valid by running it through a JSON validator before saving.Step 5: Verify the implementation is live by checking a few pages of your site with the Rich Results Test. Once Google picks up the structured data, your LinkedIn connection will be visible in search results whenever your company name is searched. This creates another credibility and consistency signal that helps with both SEO and trust-building.
Step 6: Add LinkedIn Badges and Awards to Your Website
If your company has received LinkedIn badges such as "LinkedIn Top Company" or "LinkedIn Industry Expert" recognitions, displaying these on your website adds another layer of credibility. These are visible stamps of approval from LinkedIn itself.
Step 1: Check your LinkedIn Company Page for any badges or recognitions you may have earned. LinkedIn occasionally highlights Top Companies, Best Places to Work, or industry-specific recognitions. If you have any, download the official badge images from LinkedIn's brand resources or take screenshots of your recognized status.
Step 2: Create a dedicated "Recognition" or "Awards" section on your website. Place it on your homepage, your About page, or in a prominent sidebar. Make sure the badge images are high-quality and properly sized.
Step 3: Link each badge image to your LinkedIn Company Page so that clicking the badge takes visitors directly to your LinkedIn profile where they can learn more or follow your page.
Step 4: If you do not have badges yet, this is motivation to build your LinkedIn presence more actively. Consistently posting valuable content, engaging with your audience, and gaining followers will naturally lead to more visibility and recognition on the platform over time.
Step 7: Configure LinkedIn Share Preview for Your Website Content
When someone shares a link to your website on LinkedIn, LinkedIn automatically pulls information from your pages to create a preview card. The text, image, and title that appear in that preview are critical because they determine whether someone stops their scroll and clicks through to your website. Many Singapore businesses are losing potential traffic because their LinkedIn share previews are showing the wrong image, a missing description, or a garbled title.
Step 1: Use LinkedIn's Post Inspector tool at linkedin.com/post-inspector. Enter the URL of the page you want to test and click "Inspect." LinkedIn will show you exactly what the preview looks like when that URL is shared on LinkedIn.
Step 2: If the preview looks wrong, go back to your website and check your Open Graph meta tags. These are small pieces of code in your page's
section that tell LinkedIn what to display. You need og:title, og:description, and og:image tags. Here is what each should contain: og:title should be your page title exactly as you want it to appear, typically 60 to 70 characters. og:description should be a compelling 100 to 150 character summary that makes someone want to click. og:image should be an image of at least 1200 by 627 pixels, ideally in PNG or JPG format.Step 3: In WordPress, install a plugin like "Yoast SEO" or "All in One SEO" to manage your Open Graph settings without touching code. Both plugins let you set custom og:title and og:description for each page and post, as well as choose a social share image.
Step 4: Re-inspect your URL in the Post Inspector after making changes. LinkedIn caches preview data, so the Post Inspector allows you to force-refresh the cached information. Click "Refresh" to see your updated preview.
Step 5: Create a default social share image that looks good even when a specific image is not set for a page. This image should include your logo, a clean design, and work well in a square or landscape format. Use this as your fallback og:image so that even pages without custom images get an attractive preview.
Step 8: Integrate LinkedIn Lead Gen Forms with Your Website for Higher Conversion Rates
LinkedIn Lead Gen Forms are pre-filled forms that LinkedIn offers for advertising campaigns. But the same concept can be used on your website to create smoother lead capture experiences. When a visitor clicks a call-to-action on your website, instead of directing them to a separate form page, you can open a LinkedIn pre-filled form that already has their name, email, job title, and company information ready to submit.
Step 1: Set up a Lead Gen form in LinkedIn's Campaign Manager. Navigate to the "Lead Forms" section and create a new form. Define the fields you want to capture. LinkedIn will pull available profile data to pre-fill as much as possible.
Step 2: Create a call-to-action button on your website that triggers the LinkedIn Lead Form. This typically requires LinkedIn advertising infrastructure, so if you are not currently running LinkedIn ads, this integration is more relevant once you start. However, even without ads, you can use LinkedIn's messaging features to create direct engagement pathways.
Step 3: For website owners who are not running ads but want similar functionality, consider using a form plugin that integrates with LinkedIn's profile data API through a third-party connector like Zapier. This can automate the transfer of form submissions into your CRM while pulling LinkedIn profile context.
Step 4: Track your lead generation performance in LinkedIn's campaign manager to understand which pages and calls-to-action are generating the most leads, and optimize accordingly.
Putting It All Together
LinkedIn integration for your B2B website is not about checking boxes. It is about creating a seamless experience where your website and your LinkedIn presence reinforce each other. Every integration point you add is a bridge that helps potential clients cross from casual browser to engaged prospect.
Start with the LinkedIn Insight Tag because it gives you data you need to understand your audience. Then add embed posts and follow buttons for social proof. Implement Organization schema to strengthen your SEO foundation. Configure your share previews so that when content is shared, it looks professional and compelling. As your capabilities grow, explore OAuth login and Lead Gen Form integrations.
The key principle throughout is consistency. Your company name, your tagline, your logo, your LinkedIn URL, and your messaging should all tell the same story across every platform. When search engines and human visitors see that consistency, it builds trust. And in B2B sales, trust is everything.
If you still need help, feel free to contact us at https://webcare.sg/contact for a free website health check.