Website Blocked by Browser? How to Remove ‘Dangerous Site’ Warnings
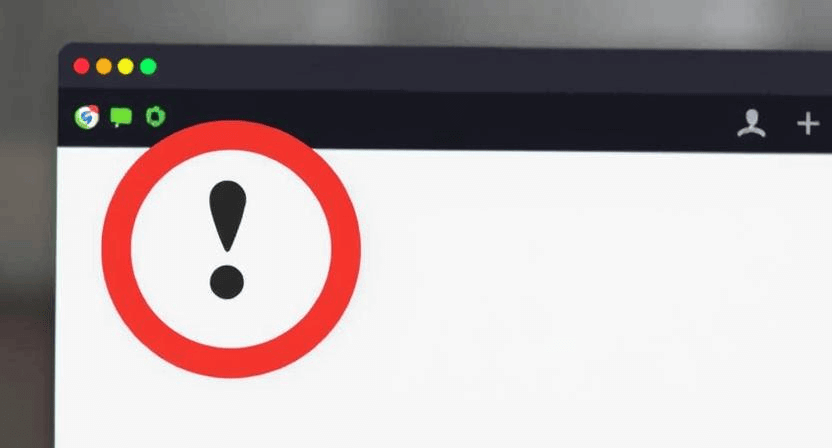
Encountering a "Dangerous Site" warning when trying to access your own website can be alarming. These warnings, often displayed prominently by browsers like Chrome, Firefox, and Safari, are a significant barrier for visitors and can severely damage your online reputation and traffic. They typically indicate that the browser's built-in security features, such as Google Safe Browsing, have flagged your site as potentially harmful due to the presence of malware, phishing attempts, or other security threats. This comprehensive guide will walk you through the steps to identify the cause of these warnings and how to remove them.
Understanding "Dangerous Site" Warnings
Browsers utilize services like Google Safe Browsing to protect users from malicious websites. When your site is flagged, it means Google (or another similar service) has detected harmful content or behavior. This could be due to a recent hack, the unintentional hosting of malicious files, or even a false positive. Regardless of the reason, it's crucial to address these warnings promptly.
Step 1: Verify the Warning and Identify the Problem
The first step is to understand why your website is being flagged. The warning message itself often provides clues.
-
Note the Specific Warning: Is it a generic "Dangerous Site" warning, or does it specify "Malware," "Phishing," or "Deceptive site"? The specific type of warning can indicate the nature of the problem.
-
Check Google Search Console: If your site is flagged by Google Safe Browsing, you should receive a notification in your Google Search Console account. The "Security Issues" report will provide details about the detected problems, such as the type of malware found or the pages affected. This is the most reliable source of information from Google.
-
Use Online Scanners: Utilize online website scanners like Sucuri SiteCheck or VirusTotal to get a second opinion and potentially identify specific malware or issues that might not be immediately apparent.
You might also want to revisit our guide on how to fix a hacked website for general steps.
Step 2: Backup Your Website (With Caution)
Before making any changes, create a full backup of your website. While the backup might contain the malicious content, it's essential for recovery if anything goes wrong during the cleanup process. Store the backup securely and offline.
Remember the importance of backups for your website.
Step 3: Identify and Remove Malware
If the warning indicates malware, you need to thoroughly scan and clean your website files and database.
-
Use a WordPress Security Plugin: If you're using WordPress, install a reputable security plugin like Wordfence, Sucuri Security, or MalCare. These plugins offer in-depth scanning and often automated malware removal tools. Follow their instructions to clean your site.
Our guide on how to identify and clean malware from your WordPress website provides detailed steps.
-
Manual Malware Removal: If you're comfortable with website files and databases, you can attempt manual removal. This involves:
-
Deleting suspicious or unfamiliar files, especially in directories like
wp-content/uploads,wp-includes, and theme/plugin folders. -
Inspecting core WordPress files, themes, and plugins for any unexpected code injections.
-
Cleaning your database by removing suspicious entries in tables like
wp_optionsandwp_posts. -
Looking for newly created or unfamiliar user accounts.
-
Examining your
.htaccessfile for any malicious redirects.
Be extremely cautious when deleting files or editing the database, as mistakes can break your website.
-
-
Consider Professional Help: If you're unsure about identifying or removing malware, it's best to seek professional help from a website security expert. They have the tools and expertise to thoroughly clean your site.
You might find our article on when you need professional help to fix your website relevant here.
Step 4: Address Phishing or Deceptive Content
If the warning relates to phishing or deceptive content, you need to identify and remove the offending pages or elements.
-
Review Your Website Content: Carefully examine all pages and forms on your website for any content that might be designed to trick users into revealing sensitive information (usernames, passwords, credit card details, etc.).
-
Remove Suspicious Forms or Pages: Delete any forms or pages that you didn't create or that seem designed for phishing.
-
Check for Redirects: Ensure that your website isn't redirecting users to malicious external sites.
Step 5: Clean Up Security Vulnerabilities
After removing the immediate threat, it's crucial to address the vulnerabilities that allowed your website to be compromised in the first place.
-
Update Everything: Ensure that your CMS (WordPress, Joomla, Drupal, etc.), themes, and all plugins are updated to their latest versions. Outdated software is a common entry point for attackers.
-
Change All Passwords: Change all passwords associated with your website, including your CMS admin account, FTP/SFTP accounts, database passwords, and hosting account password. Use strong, unique passwords.
-
Install a Security Plugin (if applicable): If you haven't already, install and configure a reputable security plugin for your CMS.
-
Harden Your Website Security: Implement security best practices like limiting login attempts, disabling file editing in the CMS, and protecting your
.htaccessfile.Our guide on how to protect against hacks and recover from security breaches provides more details.
Step 6: Request a Review from Google Safe Browsing
Once you have thoroughly cleaned your website and addressed any security vulnerabilities, you need to request a review from Google Safe Browsing (or the relevant service that flagged your site).
-
Submit a Review Request in Google Search Console: Navigate to the "Security Issues" report in Google Search Console. If the issues have been resolved, you should see an option to "Request Review." Provide as much detail as possible about the steps you've taken to clean your site.
-
Be Patient: The review process can take some time, ranging from a few hours to several days. Google will re-crawl and re-evaluate your website to ensure the harmful content has been removed.
-
Monitor the Review Status: Check the "Security Issues" report in Google Search Console for updates on the review process. If Google finds that the issues are resolved, the "Dangerous Site" warning should be removed from search results and browsers.
Step 7: Monitor Your Website Continuously
After the warning is removed, it's crucial to continuously monitor your website for any signs of reinfection or suspicious activity. Implement regular security scans, keep your software updated, and stay vigilant to prevent future issues.
Dealing with "Dangerous Site" warnings can be a stressful and complex process. If you need expert assistance in identifying the cause, cleaning your website, and requesting a review, don't hesitate to contact WebCareSG for professional website security services.
Related WebCare Solutions

Why is My Website’s Search Function Not Working? How to Fix It
A guide to troubleshooting common issues with website search functionality, ensuring users can effectively find information and products.

How to Improve Website Crawlability and Indexing
Learn the essential steps to improve your website’s crawlability and indexing to boost search engine rankings and visibility.
How to Use Social Proof to Double Your Website Conversions
A deep dive into the psychology of social proof—including testimonials, case studies, and trust signals—and how to technically integrate them to skyrocket your conversion rates.
Ready to get started?
Focus on your business while we fix your website. Contact WebCareSG today for fast, reliable solutions!
Whatsapp us on