Abandoned Cart Tracking in GA4: Setup for WordPress/Shopify
![]()
Abandoned carts are the bane of every e-commerce business. They represent interested customers who got close to converting but, for some reason, didn't complete their purchase. Understanding *why* and *where* customers abandon their carts is crucial for optimizing your store's performance. Google Analytics 4 (GA4) offers powerful tools to track these crucial points in the customer journey. This guide will walk you through setting up abandoned cart tracking in GA4 for both WordPress (WooCommerce) and Shopify, distinguishing between Enhanced eCommerce and standard events.
What is Abandoned Cart Tracking in GA4?
At its core, abandoned cart tracking in GA4 involves monitoring specific user behaviors that indicate progression (or cessation) through your e-commerce funnel. While GA4 automatically collects some basic events, a deeper understanding of abandonment requires leveraging its Enhanced eCommerce capabilities.
Enhanced eCommerce Events vs. Standard Events for Abandonment
GA4 is an event-based analytics platform. While you could technically define "custom events" for every step, Google provides a set of recommended Enhanced eCommerce events that are specifically designed for online stores and automatically populate key reports in GA4's Monetization section. These are far superior for funnel analysis than trying to piece together abandonment from generic standard events.
- Standard Events: These are events like
page_view,click,scroll. While useful for general engagement, they don't provide the rich product-level data or the structured funnel needed for deep e-commerce insights. - Enhanced eCommerce Events: These are specific, pre-defined events that include an
ecommerceobject in their dataLayer push, containing details like product IDs, names, prices, quantities, and transaction values. For abandoned cart analysis, the most critical Enhanced eCommerce events are:view_item: User views a product detail page.add_to_cart: User adds an item to their shopping cart.view_cart: User views their shopping cart page.begin_checkout: User starts the checkout process.add_shipping_info: User provides shipping details during checkout.add_payment_info: User provides payment details during checkout.purchase: User completes a purchase.
By tracking these Enhanced eCommerce events, GA4 can automatically build funnel visualizations and allow for more granular analysis of drop-off points, making them indispensable for abandoned cart tracking.
Setup for WordPress (WooCommerce)
For WordPress sites using WooCommerce, the most reliable and flexible method for sending Enhanced eCommerce events to GA4 is via Google Tag Manager (GTM) in conjunction with a specialized plugin like GTM4WP (Google Tag Manager for WordPress).
1. Ensure GTM is Installed and GTM4WP is Configured
If you haven't already, follow a guide to set up GTM on your WordPress site. Then:
- Install and Activate GTM4WP: Go to "Plugins" > "Add New" in your WordPress admin, search for "Google Tag Manager for WordPress" by Thomas Geiger, install, and activate it.
- Connect to GTM: Navigate to "Settings" > "Google Tag Manager" and enter your GTM Container ID (
GTM-XXXXXXX). - Enable WooCommerce Integration: In the GTM4WP settings, go to the "Integration" tab, select "WooCommerce," and enable "Track Enhanced Ecommerce." This tells the plugin to push the necessary eCommerce data to the
dataLayerfor events like `add_to_cart` and `begin_checkout`. - Save Changes.
2. Configure GA4 Event Tags in GTM
With GTM4WP pushing the data, you now need to create GA4 Event tags in your GTM container to capture these events.
- GA4 Configuration Tag: (If not already done) In GTM, create a "Google Analytics: GA4 Configuration" tag. Enter your GA4 Measurement ID (
G-XXXXXXX). Set its trigger to "Initialization - All Pages" or "Consent Initialization - All Pages" if using a consent management platform. - Create GA4 Event Tags for Key Abandonment Steps:
For each event (
add_to_cart,begin_checkout, etc.), create a new "Google Analytics: GA4 Event" tag:- Tag Type: "Google Analytics: GA4 Event"
- Configuration Tag: Select your existing GA4 Configuration Tag.
- Event Name: Use the exact recommended GA4 event name (e.g.,
add_to_cart,begin_checkout,view_cart). - Event Parameters: Crucially, add parameters to pass the eCommerce data. The GTM4WP plugin pushes this data into a
dataLayervariable namedecommerce. So, add an "Event Parameter" named `items` and set its value to a Data Layer Variable namedecommerce.items. Also add `currency` (ecommerce.currency) and `value` (ecommerce.currency) where applicable. - Trigger: Create a "Custom Event" trigger. The "Event name" for this trigger should exactly match the dataLayer event name pushed by GTM4WP (which is typically the same as the GA4 recommended event name, e.g.,
add_to_cart,begin_checkout,view_cart).
- Test and Publish: Use GTM's Preview mode to simulate adding items to the cart, viewing the cart, and starting checkout. Verify in the GTM Debugger and GA4's DebugView that the `add_to_cart`, `view_cart`, and `begin_checkout` events are firing with the correct eCommerce parameters. Once confirmed, publish your GTM container.
Setup for Shopify
Shopify offers a more streamlined approach for GA4 Enhanced eCommerce tracking, particularly through its native integrations or the Customer Events (Web Pixels) API.
1. Use the Google & YouTube Sales Channel App (Recommended for Basic Setup)
For most Shopify stores, the simplest way to get basic Enhanced eCommerce events (including `add_to_cart` and `begin_checkout`) to GA4 is by installing and configuring the official Google & YouTube sales channel app.
- From your Shopify admin, go to "Apps" > "Google & YouTube."
- Connect your Google account and follow the prompts to link your GA4 property.
- This app typically handles the automatic tracking of standard and many Enhanced eCommerce events, including those crucial for abandoned cart funnels.
2. Advanced Setup: Google Tag Manager with Customer Events / Web Pixels (for Customization)
If you need more control, custom parameters, or are already using GTM, you'll leverage Shopify's Customer Events (also known as Web Pixels) API, which is now the recommended way to get data into GTM.
- Install GTM: Embed your GTM container code into your `theme.liquid` file, usually just after the opening
<head>tag and before the closing</body>tag. - Configure Customer Event (Web Pixels) for DataLayer Push:
- In your Shopify admin, go to "Settings" > "Customer events."
- Click "Add custom pixel."
- Give it a name (e.g., "GA4 Custom Events").
- Here, you'll write JavaScript code that subscribes to Shopify's standard events (like `cart_updated`, `checkout_started`) and pushes the corresponding data to the `dataLayer` for GTM.
Example for `add_to_cart` (simplified):
analytics.subscribe('product_added_to_cart', (event) => {
  const products = event.data.cart.lines.map(line => ({
    item_id: line.merchandise.sku || String(line.merchandise.product.id),
    item_name: line.merchandise.product.title,
    price: parseFloat(line.merchandise.price.amount),
    quantity: line.quantity,
    item_variant: line.merchandise.title,
    currency: line.merchandise.price.currencyCode
  }));

  window.dataLayer = window.dataLayer || [];
  window.dataLayer.push({
    event: 'add_to_cart',
    ecommerce: {
      currency: event.data.cart.cost.totalAmount.currencyCode,
      value: parseFloat(event.data.cart.cost.totalAmount.amount),
      items: products
    }
  });
});
You would repeat this for `checkout_started` (for `begin_checkout`), `cart_viewed` (for `view_cart`), etc., mapping Shopify's event data to GA4's `ecommerce` schema.
- Create GA4 Event Tags in GTM: Similar to the WordPress setup, create "Google Analytics: GA4 Event" tags in GTM for `add_to_cart`, `view_cart`, `begin_checkout`, etc. Configure them to read the `ecommerce` object and `items` array from the `dataLayer` variable. Set up "Custom Event" triggers matching the `event` names you pushed (e.g., `add_to_cart`, `begin_checkout`).
- Test and Publish: Use GTM's Preview mode and GA4's DebugView to ensure events fire correctly with all relevant parameters. Publish your GTM container and custom pixel when ready.
Analyzing Abandoned Carts in GA4
Once your tracking is set up, GA4 provides powerful tools to visualize and analyze your e-commerce funnel:
1. Funnel Exploration Report
This is your primary tool for abandoned cart analysis:
- In GA4, navigate to "Explore" in the left-hand menu.
- Click on "Funnel exploration" to create a new report.
- Define your funnel steps using the Enhanced eCommerce events:
- Step 1:
view_item(Users viewed a product) - Step 2:
add_to_cart(Users added to cart) - Step 3:
begin_checkout(Users started checkout) - Step 4:
purchase(Users completed purchase)
- Step 1:
- You can add more granular steps like
add_shipping_infoandadd_payment_infofor deeper checkout analysis. - The report will visualize drop-off rates between each step, pinpointing where customers are abandoning.
2. Create Audiences for Retargeting
GA4 allows you to create audiences of users who performed certain actions but not others, perfect for abandoned cart recovery campaigns.
- In GA4, go to "Admin" > "Audiences" > "New audience."
- Choose "Custom audience."
- Define your audience with conditions like:
- "Event"
add_to_cart(orbegin_checkout) "AND" - "Event exclusion"
purchase(within a certain time frame).
- "Event"
- Name your audience (e.g., "Cart Abandoners - 7 Days").
- Publish this audience and link your GA4 property to Google Ads to use it for remarketing campaigns.
By diligently setting up Enhanced eCommerce events and leveraging GA4's exploration and audience features, you can gain profound insights into your abandoned carts, allowing you to optimize your customer journey, run targeted recovery campaigns, and ultimately boost your conversion rates. If these technical steps feel overwhelming, consider reaching out to a digital analytics specialist at WebCareSG who can ensure your tracking is robust and actionable. Contact us today.
Related WebCare Solutions
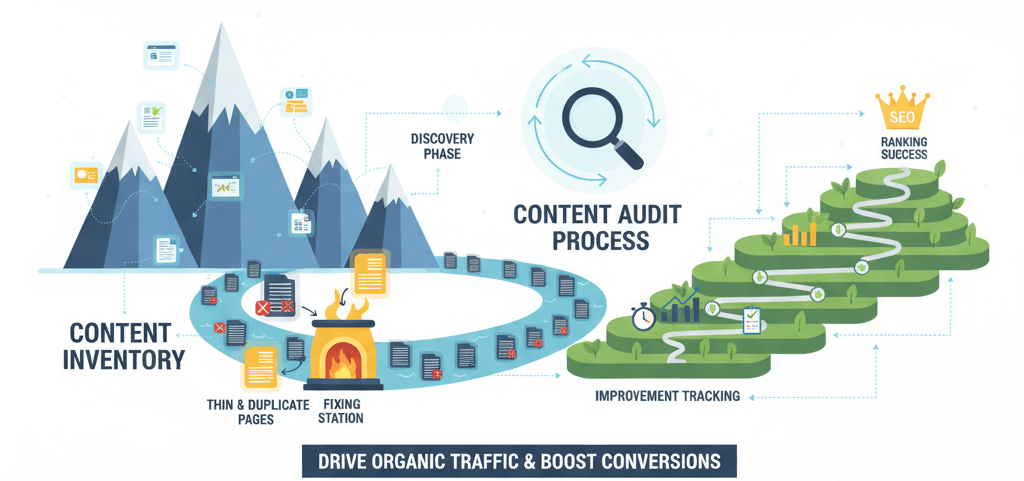
Content Audit: Find and Fix Thin/Duplicate Pages That Hurt SEO
How to run a content inventory, identify thin/duplicate content, consolidate or improve pages, and track recovery.

What to Do When Your Website Shows a 'Not Secure' Warning
Learn how to resolve 'Not Secure' warnings on your website. Improve trust and security for your visitors with these expert tips.

How to Identify and Clean Malware from Your WordPress Website
Learn the essential steps to clean up malware from your WordPress site and secure it for the future. A practical guide for website owners.
Ready to get started?
Focus on your business while we fix your website. Contact WebCareSG today for fast, reliable solutions!
Whatsapp us on